Session 1: Intro to the Design Cycle

Session 1
Intro to the Design Cycle
Today's Goal
- Learn the 6-stage design cycle that structures this entire semester
- See how everything — safety, measurement, the launcher project — fits onto it
- This is the "why" of the whole course
Quick Poll
What comes to mind when you hear "the engineering process"?
(No wrong answers yet — let's see what we've got.)
Last Year vs. This Year
Freshman year: you learned tools — 2D/3D CAD (AutoCAD, OnShape).
This year: you learn the process those tools serve.
Last Year vs. This Year
Tools without process means you can draw it, but not design it.
The Design Cycle
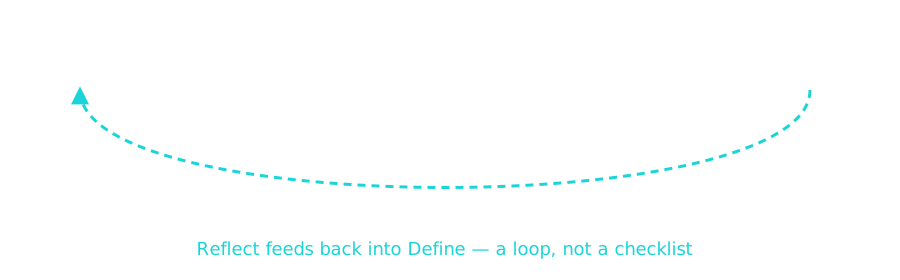
Stage 1: Define
- Who's it for?
- What do they need?
- What are the constraints?
- What does success look like?
"A vague idea isn't a design problem yet."
Stage 2: Design
- Generate multiple alternatives
- Choose between them deliberately
- Commit to one before building
Stage 3: Build
Turn the chosen design into something that actually exists.
Physical or digital — it has to be real, not theoretical.
Stage 4: Test
Check the thing against the success criteria you defined.
Not against "does it feel done."
Stage 5: Iterate
Make a targeted change based on what the test told you.
Not a random do-over.
Stage 6: Reflect
Step back and explain why it worked or didn't.
What carries into the next project.
Worked Example: Bike Helmet Strap
A rider's helmet strap keeps slipping loose. Let's walk the cycle.
| Stage | What it looks like |
|---|---|
| Define | The strap loosens mid-ride. It needs to stay snug without being uncomfortable. |
| Design | Sketch three buckle ideas instead of building the first one that comes to mind. |
| Build | Make a working version of the strongest concept. |
| Test | Put it under real load — does it actually hold, or just look like it should? |
| Iterate | If it slips, adjust one specific thing (buckle tension) — not the whole design. |
| Reflect | Why did that fix work? What would you check first on the next strap? |
Notice: every stage here is a specific action, not a vague step.
Same Cycle, Bigger Project
This exact loop runs all semester — just with bigger stakes.
Same Cycle, Bigger Project
- Define/Design: frame a real problem before touching any tools
- Build: in the makerspace, with real materials
- Test/Iterate: using real data, not guesswork
- Reflect: explaining your choices, not just showing a finished product
Nothing new gets added later — it's always this same six-stage loop.
Activity: Where Does It Go?
Here's the story: you and a friend are building a skateboard ramp for your driveway.
- Your friend shows you exactly how to keep your fingers clear of the table saw blade before you're allowed to cut the plywood
- You measure the ramp's angle with a protractor to make sure it matches the sketch you drew
- You try out the finished ramp to see if the height feels right
- It launches you a little too high, so you shave an inch off instead of tearing the whole thing apart
- You explain to your friend why you went with plywood instead of the cardboard you first considered
There's no single right answer for every item — some could fit more than one stage. Be ready to explain your reasoning.
Two Things to Remember
Iterate ≠ starting over.
It means making one targeted change — not throwing out the whole design.
Two Things to Remember
Build isn't separate from Design.
Building is just acting on a design decision you already made.
Next Time
Session 2: Problem Framing
The stage most often skipped — and the one that matters most.
'F' → Fullscreen
Build
Today's "build" is conceptual. Here's the story: you and a friend are building a skateboard ramp for your driveway. Work with a partner to place each of the five moments below onto the design cycle. Agree on one stage — Define, Design, Build, Test, Iterate, or Reflect — that each moment fits best, and be ready to explain your reasoning. Some moments don't have a single clean answer, and that's intentional.
Where Does It Go?
- Your friend shows you exactly how to keep your fingers clear of the table saw blade before you're allowed to cut the plywood
- You measure the ramp's angle with a protractor to make sure it matches the sketch you drew
- You try out the finished ramp to see if the height feels right
- It launches you a little too high, so you shave an inch off instead of tearing the whole thing apart
- You explain to your friend why you went with plywood instead of the cardboard you first considered
For each moment, write down: which stage it belongs to, and why.
Checkpoint
Before moving on, compare your pair's reasoning against these two common sticking points.
- Iterate ≠ starting over
- It means making one targeted change based on what you just learned — not throwing out the whole design.
- Build isn't separate from Design
- Building is just acting on a design decision you already made. They're connected, not two different jobs.
If your pair's placement for "measuring the ramp's angle" or "your friend showing you how to keep your fingers clear of the blade" doesn't match another pair's, that's expected — both items genuinely span more than one stage.
Reflection
This is today's exit ticket — complete it before you leave.
Pick any 3 of the 5 moments from the Build section above. For each one:
- Name which stage of the design cycle it belongs to — Define, Design, Build, Test, Iterate, or Reflect.
- Write one sentence explaining why.
An activity can belong to more than one stage — if you think it does, say so and explain your reasoning.
Submit
Hand in your exit ticket before leaving class.